
- Today
- Total
| 일 | 월 | 화 | 수 | 목 | 금 | 토 |
|---|---|---|---|---|---|---|
| 1 | 2 | 3 | 4 | 5 | 6 | 7 |
| 8 | 9 | 10 | 11 | 12 | 13 | 14 |
| 15 | 16 | 17 | 18 | 19 | 20 | 21 |
| 22 | 23 | 24 | 25 | 26 | 27 | 28 |
- c언어
- 프로그래밍
- 쉬운 파이썬
- 중간시험
- 채용문제
- Crawling
- selenium
- 알고리즘 강좌
- 셀레니움
- 알고리즘
- 파이썬활용
- 코딩문제
- 크롤링
- 자료구조 강의
- 대학시험
- 기말시험
- 자료구조
- gdrive
- 파이썬
- python 중간고사
- 면접 파이썬
- 파이썬 입문
- python data structure
- 파이썬3
- 코딩시험
- 알고리즘 강의
- 파이썬 강좌
- 파이썬 자료구조
- 파이썬 알고리즘
- 파이썬 강의
반원 블로그
1회차 - 03 react native 날씨 앱 따라 만들기(2), 리액트 네이티브 Nox, BlueStack으로 연동 개발하기 본문
1회차 - 03 react native 날씨 앱 따라 만들기(2), 리액트 네이티브 Nox, BlueStack으로 연동 개발하기
반원_SemiCircle 2020. 6. 29. 17:43계속 이어서 노마드코더 니콜라스의 React Native Weather를 따라해보도록 하자. #0 4부터 시작
실행 모드
- yarn android 또는 npm run android
- yarn ios 또는 npm run ios
위의 명령어 대신 에뮬레이터(크롬)를 사용할 경우 - Run on iOS simulator
- Run on Android
를 클릭하는 것과 같다.
expo가 web은 테스트 중인듯.
여기부터 #0 5은 대충만 적기로
(모바일 앱, 네이티브 앱을 만드는 방법에 대한 소개 내용, 자바 코틀린, 웹뷰, 코드로바, 자바스크립트, 리액트 컴포넌트, 브릿지 등)
Web개발자가 React Native를 작성하기위해 필요한 것들
리액트로 작성하는 리액트네이티브는 안드로이드,iOS 둘 다 자바스크립트 엔진이 있는 것을 이용한 것으로, 기존 존재하는 스마트폰 컴포넌트와 javascript 코드 및 엔진을 연결시켜주는(브릿지) 과정을 구현한 것이다.
따라서 리액트 컴포넌트를 참조(import)하는 구문이 위에 있고, javascript로 구현하는 과정이 export default function App(){}안에 구현한다.
대신 이런 건 알아야 한다.
- 웹 에서 텍스트는
<span>태그 쓰는데, 리액트 네이티브는<Text>쓴다. - 웹 에서 영역을
<div>를 쓰는데, 리액트 네이티브는<View>를 쓴다.
또한 reavt native는 CSS엔진을 구현했기 때문에 flex box 같은 것을 사용할 수 있다.const styles = StyleSheet.create({}) 내부에 구현한다. justifyContent, backgroundColor 등이 사용할 수 있다.
다만 다른 점은 자바스크립트 오브젝트처럼 작성해야한다.(근데 이건 CSS에서도 원래 그러지 않나?)
몇 가지 예외의 경우 작동이 안되는 경우도 있을 수 있다.
import { StatusBar } from 'expo-status-bar';
import React from 'react';
import { StyleSheet, Text, View } from 'react-native';

export default function App() {
  return (
    <View style={styles.container}>
      <Text>Hello!!!!!!!!</Text>
      <StatusBar style="auto" />
    </View>
  );
}

const styles = StyleSheet.create({
  container: {
    flex: 1,
    backgroundColor: '#fff',
    alignItems: 'center',
    justifyContent: 'center',
  },
});
기본적으로 container가 있다.(마치 body같군.)
암튼 이걸 해주는 녀석이 StyleSheet API이다. 그래서 StyleSheet.create({})이다.
css가 안되는 경우
웹과 reactnative가 완전히 같지 않기때문에 안되는 것들이 있다.
예로 body에 color:"white"를 하면 웹 사이트는 흰 글씨로 가득차겠지만,
리액트 네이티브에서 container에 color:"white"를 해도 변화가 없다. 만일 내부 텍스트 색을 바꾸려면 다음처럼 해야한다.
안드로이드 스튜디오 애뮬레이터나 스마트폰 말고 Nox나 블루스택(Bluestack)같은 에뮬레이터로 하려면?
아이폰 연동 방식에서 노트북 터미널에 expo login을 입력해서 로그인하고 expo앱에 로그인하면 된다는 게 생각나서 똑같이 Nox에 Expo설치하고 해봤더니 된다.

text에 width : "100px"은 안되는데 "100%"는 되는 등의 차이가 있다. 안되면 안된다고 바로바로 나오니 고치기는 쉬울 것이다.

여기부터 #0 6 - 리액트 네이티브의 레이아웃에 대한 내용
flexDirection
기본적으로 flexDirection :"column"이다. 그래서 추가 작성하면 한줄 한줄 넘어간다.
그래서 이를 flexDirection : "row"로 주면 다음처럼 된다.

import { StatusBar } from 'expo-status-bar';
import React from 'react';
import { StyleSheet, Text, View } from 'react-native';

export default function App() {
    return (
    <View style={styles.container}>
        <Text style={styles.text}>Hello!!!!!!!!</Text>
        <Text style={styles.text}>Hello!!!!!!!!</Text>

        <StatusBar style="auto" />
    </View>
  );
}

const styles = StyleSheet.create({
    container: {
        flex: 1,
        backgroundColor: '#00f',
        alignItems: 'center',
        justifyContent: 'center',
        flexDirection : "row"
    },
    text : {
        color:"white",
    },
});
flex
import { StatusBar } from 'expo-status-bar';
import React from 'react';
import { StyleSheet, Text, View } from 'react-native';

export default function App() {
    return (
    <View style={styles.container}>
        <View style={styles.blueView}/>
        <View style={styles.yellowView}/>
        <StatusBar style="auto" />
    </View>
  );
}

const styles = StyleSheet.create({
    container: {
        flex: 1,
        justifyContent: 'center',
    },
    blueView : {
        flex : 1,
        backgroundColor:"blue",
    },
    yellowView : {
        flex : 1,
        backgroundColor:"yellow",
    },
});

현재 부모는 container 자식은 blueView,yellowView이다.
부모 컨테이너는 flex:1이고, 모든 공간 사용가능을 의미한다. 저기서 container의 flex:1을 없애면 전부 공간이 없어진다.
자식들은 모두 flex:1이므로 반절씩 가져간다. 이건 안드로이드 앱 개발할 때의 weight와 비슷한 개념이다. 예로 1:2 비중으로 주면 다음처럼 된다.

flext, direction, justifyContent, alignItems, flexwrap, nowrap
이건 CSS와 거의 똑같다.
리엑트 네이티브는 flex위주로 개발해서 width, height를 많이 쓰지 않는다.
또한 가능하면 flex로 개발해야 반응형 앱이 만들 수 있다.
여기부터 #1 1 Loading Screen
Loading.js
App.js와 같은 위치에 Loading.js를 생성하고 작업한다.
Loading.js
import React from 'react';
import { StyleSheet, Text, View } from 'react-native';
export default function Loading(){
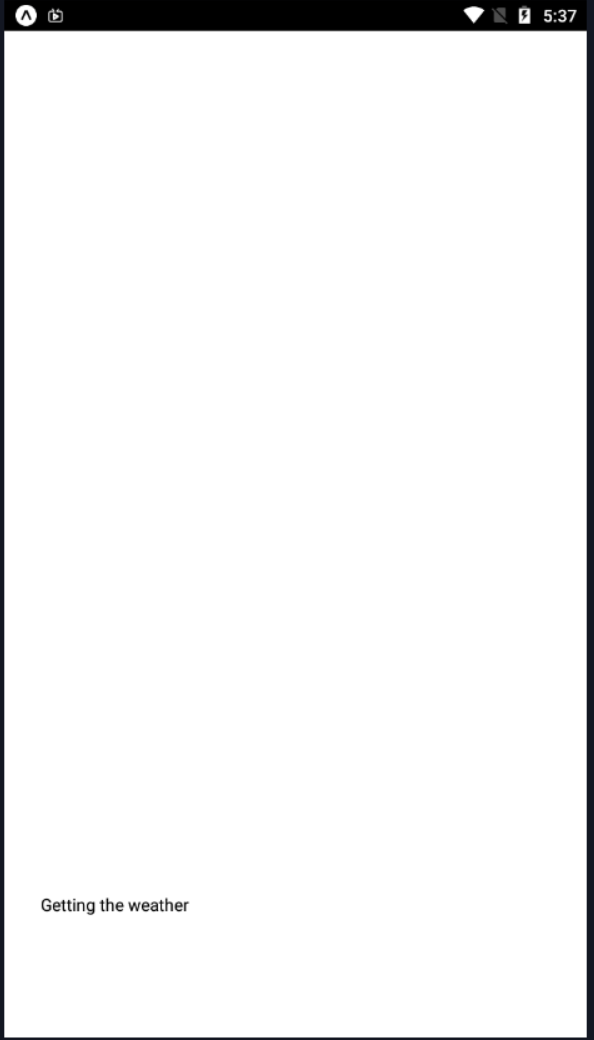
return <View style={styles.container}>
<Text>Getting the weather</Text>
</View>;
}
const styles = StyleSheet.create({
container : {
flex : 1
}
})메인 파일은 App.js임으로 Loading.js를 참조(import)하도록 작성한다.
App.js
import React from 'react';
import Loading from "./Loading";

export default function App() {
    return <Loading/>;
}
이렇게 했더니 function Loading() 호출이 태그 작성시 작동한다.

현재 텍스트가 위에 있어서 justifyContent:"flex-end",를 주어 아래로 내렸다. 그 외에 padding도 좀 부여했다.
Loading.js
import React from 'react';
import { StyleSheet, Text, View } from 'react-native';

export default function Loading(){
    return <View style={styles.container}>
        <Text>Getting the weather</Text>
    </View>;
}


const styles = StyleSheet.create({
    container : {
        flex : 1,
        justifyContent:"flex-end",
        paddingHorizontal : 30,
        paddingVertical : 100,
    }

})
디자인 변경
배경색도 주고, 글씨 디자인도 바꿔보자
px를 표현하려면 "30px"로 써야하는데 px를 안쓰고 30이라고 쓰면 리엑트 네이티브가 알아서 바꿔준다.

import React from 'react';
import { StyleSheet, Text, View } from 'react-native';

export default function Loading(){
    return <View style={styles.container}>
        <Text style={styles.text}>Getting the weather</Text>
    </View>;
}


const styles = StyleSheet.create({
    container : {
        flex : 1,
        justifyContent:"flex-end",
        paddingHorizontal : 30,
        paddingVertical : 100,
        backgroundColor : "#FDF6AA",
    },
    text:{
        color : "#2c2c2c",
        fontSize : 30,
    }

})'2018~ > react native' 카테고리의 다른 글
| 1회차 - 07 ES6 문법 - rest operator (0) | 2020.06.30 |
|---|---|
| 1회차 - 06 componentDidUpdate , ReactNative의 LifeCycle API (0) | 2020.06.30 |
| 1회차 - 05 ES6 문법 - Async, Await (0) | 2020.06.30 |
| [자료 찾기] react native expo로 firebase 사용하기 (0) | 2020.06.30 |
| 1회차 - 04 react native 날씨 앱 따라 만들기(3), 지역 가져오기 (1) | 2020.06.29 |
| 1회차 - 02 react native 날씨 앱 따라 만들기(1) (0) | 2020.06.29 |
| 1회차 - 01 ES6 문법 - Babel 표기법. String Literal, 객체, 배열, Spread Operator, for of 문 (0) | 2020.06.28 |
| 1회차 - 00 react native 개요 및 개발환경 설정 (0) | 2020.06.28 |

