
- Today
- Total
| 일 | 월 | 화 | 수 | 목 | 금 | 토 |
|---|---|---|---|---|---|---|
| 1 | 2 | 3 | 4 | 5 | 6 | 7 |
| 8 | 9 | 10 | 11 | 12 | 13 | 14 |
| 15 | 16 | 17 | 18 | 19 | 20 | 21 |
| 22 | 23 | 24 | 25 | 26 | 27 | 28 |
- gdrive
- 채용문제
- 파이썬
- 프로그래밍
- python data structure
- 대학시험
- 알고리즘 강좌
- 크롤링
- 자료구조
- 셀레니움
- 기말시험
- 쉬운 파이썬
- 면접 파이썬
- 알고리즘 강의
- 자료구조 강의
- 파이썬 강좌
- 파이썬 입문
- 파이썬 강의
- Crawling
- selenium
- 파이썬활용
- 알고리즘
- 중간시험
- 코딩문제
- 파이썬 알고리즘
- 파이썬3
- c언어
- python 중간고사
- 파이썬 자료구조
- 코딩시험
반원 블로그
1회차 - 09 react native 날씨 앱 따라 만들기(4) - 디자인 시작 본문
계속 이어서 노마드코더 니콜라스의 React Native Weather를 따라해보도록 하자.
이제부터 디자인 부분이다.
영상 #2 0 Displaying Temperature 부터 시작합니다.
현재 흰색화면은 당연
render함수에 <Loading>이 리턴되는 조건이 isLoading이 false일 경우이다.
날씨 데이터를 제대로 받아와졌다면, 당연히 흰색으로 나온다.
openweather api uni format
보통이라면 섭씨를 사용하지만, openweather api는 절대온도 기준으로 값이 나온다.
파이썬 할 때는 그냥 공식으로 변환했었는데, 나중에서야 요청할 대 units설정이 있다는 걸 알게되었었다.
여기서도 마찬가지로 요청할 때부터 섭씨로 요청을 하자.
- https://openweathermap.org/current#data
- standard api.openweathermap.org/data/2.5/find?q=London
- metric api.openweathermap.org/data/2.5/find?q=London&units=metric
- imperial api.openweathermap.org/data/2.5/find?q=London&units=imperial
// define get openweather api function
    getWeather = async(latitude, longitude) =>{
        const {data} = await axios.get(
            `https://api.openweathermap.org/data/2.5/weather?lat=${latitude}&lon=${longitude}&appid=${API_KEY}&units=metric`
        );
        console.log(data);
    }
날씨 데이터 정리하기
일단 weather api를 가져온 데이터를 분석 할 수 있어야 한다.(하지만 나는 openweahtermap을 많이 해봐서 알고 있다.)
'weather'->'main'정보의 Haze는 먼지가 조금 낀 안개일 때 나오는 용어
이에 대한 정보는 여기 있다.
온도에 대한 컴포넌트부터 만들기
temperature에 대한 컴포넌트를 만들자. 파일명은 Weather.js
여러 속성(prop)을 가질것이라서 다음을 터미널에 입력한다.
- npm install prop-types
- yarn add prop-types
그리고 기본 코드를 작성해준다.
스타일을 작성할 수 있게 StyleSheet를 참조하고 방금 설치한 prop-type을 이용한 코드도 작성합니다.
그리고 View랑 Text도 사용할것이니 react-native에서 참조한다.
** Weather.js **
import React from "react";
import { View, Text, StyleSheet } from "react-native";
import PropTypes from "prop-types";

export default function Weather({temp}){
    return <View><Text></Text></View>
}

Weather.propTyeps={

}
Weather.propTyeps에는 App.js가 넘겨줄 날씨 데이터를 보관할 수 있도록 다음처럼 작성한다.
import React from "react";
import { View, Text, StyleSheet } from "react-native";
import PropTypes from "prop-types";

export default function Weather({temp}){
    return (
        <View>
            <Text>{temp}</Text>
        </View>
    );
}

Weather.propTyeps={
    temp : PropTypes.number.isRequired
};
이제 스타일을 1차적으로 설정해본다.
import React from "react";
import { View, Text, StyleSheet } from "react-native";
import PropTypes from "prop-types";

export default function Weather({temp}){
    return (
        <View style={styles.container}>
            <Text>{temp}</Text>
        </View>
    );
}

Weather.propTyeps={
    temp : PropTypes.number.isRequired
};

const styles = StyleSheet.create({
    container : {
        flex : 1,
        justifyContent : "center",
        alignItems : "center",
    }
})
App.js에 Wheater.js 컴포넌트 가져오기
App.js의 render에서 null대신에 <Weather/>를 넣고 이를 참조하는 코드를 위에 넣어주면된다.
import React from 'react';
import {Alert} from 'react-native'
import Loading from "./Loading";
import * as Location from 'expo-location'
import axios from 'axios';
import Weather from "./Weather";

const API_KEY = "api key";

export default class extends React.Component {
    // state
    state = {
        isLoading : true
    };

    // define get openweather api function
    getWeather = async(latitude, longitude) =>{
        const {data} = await axios.get(
            `https://api.openweathermap.org/data/2.5/weather?lat=${latitude}&lon=${longitude}&appid=${API_KEY}&units=metric`
        );
        console.log(data);
    }

    // 함수 만들기
    geoLocation = async() => {
        try{
            const response = await Location.requestPermissionsAsync();
            const {coords : {latitude, longitude}}  = await Location.getCurrentPositionAsync();
            console.log(latitude, longitude);

            // send weather api call
            this.getWeather(latitude, longitude);

            // 위 작업 전부 처리되면 로딩화면 종료
            this.setState({ isLoading:false });
        } catch(error){
            // 사용자가 허용안하면 위 코드에서 에러가 나고 그럼 여기가 실행
            Alert.alert("Can't find you.", "So sad");
        }
    }

    componentDidMount(){
        this.geoLocation();
    }
    render(){
        const { isLoading } = this.state;
        return isLoading ? <Loading/> : <Weather/>;
    }
}
그런데 Weather.js에 날시 정보를 넘겨줘야한다.
즉 날씨 데이터를 요청받았을 때 state라고 하는 변수에 이 값을 넣을 수 있다.
동시에 로딩도 끝내야 하니 다음처럼 작성한다.this.setState({isLoading:false, temp: data.main.temp})
import React from 'react';
import {Alert} from 'react-native'
import Loading from "./Loading";
import * as Location from 'expo-location'
import axios from 'axios';
import Weather from "./Weather";

const API_KEY = "api key";

export default class extends React.Component {
    // state
    state = {
        isLoading : true
    };

    // define get openweather api function
    getWeather = async(latitude, longitude) =>{
        const {data} = await axios.get(
            `https://api.openweathermap.org/data/2.5/weather?lat=${latitude}&lon=${longitude}&appid=${API_KEY}&units=metric`
        );
        console.log(data);
        this.setState({isLoading:false, temp: data.main.temp})
    }

    // 함수 만들기
    geoLocation = async() => {
        try{
            const response = await Location.requestPermissionsAsync();
            const {coords : {latitude, longitude}}  = await Location.getCurrentPositionAsync();
            console.log(latitude, longitude);

            // send weather api call
            this.getWeather(latitude, longitude);

            // 위 작업 전부 처리되면 로딩화면 종료
            this.setState({ isLoading:false });
        } catch(error){
            // 사용자가 허용안하면 위 코드에서 에러가 나고 그럼 여기가 실행
            Alert.alert("Can't find you.", "So sad");
        }
    }

    componentDidMount(){
        this.geoLocation();
    }
    render(){
        const { isLoading } = this.state;
        return isLoading ? <Loading/> : <Weather/>;
    }
}
이래도 값이 <Weather/> 에 적용이 안되는데 render() 함수 내부에서 사용할 수 있도록const { isLoading} = this.state;를 const { isLoading, temp} = this.state;로 변경해서 2가지 모두 가져올 수 있도록 한다.
import React from 'react';
import {Alert} from 'react-native'
import Loading from "./Loading";
import * as Location from 'expo-location'
import axios from 'axios';
import Weather from "./Weather";

const API_KEY = "api key";

export default class extends React.Component {
    // state
    state = {
        isLoading : true
    };

    // define get openweather api function
    getWeather = async(latitude, longitude) =>{
        const {data} = await axios.get(
            `https://api.openweathermap.org/data/2.5/weather?lat=${latitude}&lon=${longitude}&appid=${API_KEY}&units=metric`
        );
        console.log(data);
        this.setState({isLoading:false, temp: data.main.temp})
    }

    // 함수 만들기
    geoLocation = async() => {
        try{
            const response = await Location.requestPermissionsAsync();
            const {coords : {latitude, longitude}}  = await Location.getCurrentPositionAsync();
            console.log(latitude, longitude);

            // send weather api call
            this.getWeather(latitude, longitude);

            // 위 작업 전부 처리되면 로딩화면 종료
            this.setState({ isLoading:false });
        } catch(error){
            // 사용자가 허용안하면 위 코드에서 에러가 나고 그럼 여기가 실행
            Alert.alert("Can't find you.", "So sad");
        }
    }

    componentDidMount(){
        this.geoLocation();
    }
    render(){
        const { isLoading, temp } = this.state;
        return isLoading ? <Loading/> : <Weather temp={temp} />;
    }
}
소수점 버리기
Math의 round함수를 이용하면 버릴 수 있다.return isLoading ? <Loading/> : <Weather temp={Math.round(temp)} />;
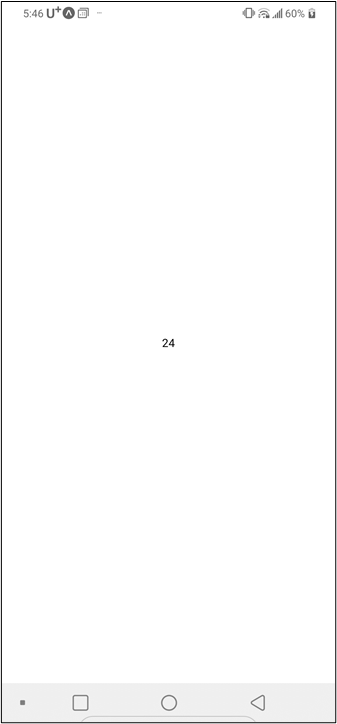
여기부터 #2 1 Getting the Condition Names
weather condition code 파악하기
이중 Weather condition codes에 대한 내용을 전부 가져와야 한다.
크롤링 할까 고민할 필요도 없고, 고정값이니 그냥 하나하나 가져와서 Weather.PropTypes에 작성해둔다.condition : PropTypes.oneOf(["Thunderstorm","Drizzle","Rain","Snow","Atmosphere","Clear","Clouds"])
그리고 이 데이터가 필요하니 isRequired까지 적어준다.
Weather.js
import React from "react";
import { View, Text, StyleSheet } from "react-native";
import PropTypes from "prop-types";

export default function Weather({temp}){
    return (
        <View style={styles.container}>
            <Text>{temp}</Text>
        </View>
    );
}

Weather.propTyeps={
    temp : PropTypes.number.isRequired,
    condition : PropTypes.oneOf(["Thunderstorm","Drizzle","Rain","Snow","Atmosphere","Clear","Clouds","Haze"]).isRequired
};

const styles = StyleSheet.create({
    container : {
        flex : 1,
        justifyContent : "center",
        alignItems : "center"
    }
})
App.js에서 Weather 컴포넌트 사용시 값 넘겨주기
일단은 임시로 condition : "Clear"로 임시로 지정하고 this.setState로 저장하자. 나중에 여기를 실제 값으로 넣어주면 된다.
    // define get openweather api function
    getWeather = async(latitude, longitude) =>{
        const {data} = await axios.get(
            `https://api.openweathermap.org/data/2.5/weather?lat=${latitude}&lon=${longitude}&appid=${API_KEY}&units=metric`
        );
        console.log(data);
        this.setState({isLoading:false, condition:"Clear", temp: data.main.temp})
    }
그리고 render에서도 condition 값을 사용할 수 있도록 작성합니다.
    render(){
        const { isLoading, temp, condition } = this.state;
        return isLoading ? <Loading/> : <Weather temp={Math.round(temp)} condition={condition} />;
    }
실제 날씨 데이터 응답에서 가져오기
data.main.temp 이런 식으로 비슷하게 data.weather.main으로 가져와도 된다.
그런데 여기서는 ES6 방식으로 가져와보자.
기존
    // define get openweather api function
    getWeather = async(latitude, longitude) =>{
        const {data} = await axios.get(`https://api.openweathermap.org/data/2.5/weather?lat=${latitude}&lon=${longitude}&appid=${API_KEY}&units=metric`
        );
        console.log(data);
        this.setState({isLoading:false, condition:"Clear", temp: data.main.temp})
    }    // define get openweather api function
    getWeather = async(latitude, longitude) =>{
        const {data} = await axios.get(
            `https://api.openweathermap.org/data/2.5/weather?lat=${latitude}&lon=${longitude}&appid=${API_KEY}&units=metric`
        );
        console.log(data);
        this.setState({isLoading:false, condition:"Clear", temp: data.main.temp})
    }
변경
    // define get openweather api function
    getWeather = async(latitude, longitude) =>{
        const {data : {main : {temp}, weather} } = await axios.get(
            `https://api.openweathermap.org/data/2.5/weather?lat=${latitude}&lon=${longitude}&appid=${API_KEY}&units=metric`
        );
        // console.log(data);
        this.setState({isLoading:false, condition:weather[0].main, temp: temp})
    }
보면 응답데이터를 data변수에 저장할 때, 그 응답데이터의 main.temp를 temp변수로 가져오고, weather은 그대로 가져왔다.(객체 비구조화 https://gosmcom.tistory.com/161 )
이후 this.setState로 state에 저장시킬 때 weather[0].main으로 저장하고, temp는 그대로 temp로 저장한다. 헷갈린다면 By geographic coordinates의 응답데이터 예시를 보도록 하자.
빼먹은 카테고리 추가하기
- https://openweathermap.org/weather-conditions
막상 응답데이터에는 있으나 카테고리에는 없는 텍스트가 있다. "Haze"와 "Mist"가 그러한데 넣어주도록 하자.
그런데 더 찾아보면 더 있다.ㅠㅠ 모든 날씨에 대해 응답하고싶다면 Atmosphere있는 녀석들을 다 추가해줘야 한다.
영상은 Haze, Mist, Dust만 추가한다.
** Weather.js **
Weather.propTyeps={
    temp : PropTypes.number.isRequired,
    condition : PropTypes.oneOf(["Thunderstorm","Drizzle","Rain","Snow","Atmosphere","Clear","Clouds","Haze","Dust"]).isRequired
};
여기부터 #2 2 Icons and Styling
Expo의 vector icons로 디자인 하기
Icons

As trendy as it is these days, not every app has to use emoji for all icons 😳 -- maybe you want to pull in a popular set through an icon font like FontAwesome, Glyphicons or Ionicons, or you just use some PNGs that you carefully picked out on The Noun Project. Let's look at how to do both of these approaches.

@expo/vector-icons
This library is installed by default on the template project that get through expo init -- it is part of the expo package. It includes popular icon sets and you can browse all of the icons using the @expo/vector-icons directory.

아이콘

요즘 유행하는 것처럼 모든 앱에서 모든 아이콘에 이모지를 사용하지 않아도됩니다. FontAwesome, Glyphicons 또는 Ionicons와 같은 아이콘 글꼴을 통해 인기있는 세트를 가져 오거나 신중하게 사용하는 PNG를 사용하십시오 명사 프로젝트 에서 골랐습니다 . 이 두 가지 방법을 모두 수행하는 방법을 살펴 보겠습니다.

@ 박람회 / 벡터 아이콘
이 라이브러리는 기본적으로 템플릿 프로젝트에 설치되며 패키지의 expo init일부입니다 expo. 널리 사용되는 아이콘 세트가 포함되어 있으며 @ expo / vector-icons 디렉토리를 사용하여 모든 아이콘을 찾아 볼 수 있습니다 .
expo init의 일부 즉 이미 설치가 되어있으니 사용해보자.
예시
import * as React from 'react';
import { Ionicons } from '@expo/vector-icons';

export default class IconExample extends React.Component {
  render() {
    return (
      <Ionicons name="md-checkmark-circle" size={32} color="green" />
    );
  }
}
현재 보일 화면은 Weather.js이니 여기에 추가하도록 작성한다.
이후 @expo/vector-icons directory. 라는 링크를 클릭하면 아이콘을 검색할 수 있다.
너무 많으니 filter를 선택하고 Feather를 클릭하자.

그런데 Feather에는 원하는 날씨 표현이 없는 경우가 있다. 여기서는 material communityicons를 이용해보자.
그래서 기존 Ionicons 참조하는 코드를import { MaterialCommunityIcons } from '@expo/vector-icons'; 로 변경했다.
Weather.js
import React from "react";
import { View, Text, StyleSheet } from "react-native";
import PropTypes from "prop-types";
import { MaterialCommunityIcons } from '@expo/vector-icons';

export default function Weather({temp}){
    return (
        <View style={styles.container}>
            <Text>{temp}</Text>
        </View>
    );
}

Weather.propTyeps={
    temp : PropTypes.number.isRequired,
    condition : PropTypes.oneOf(["Thunderstorm","Drizzle","Rain","Snow","Atmosphere","Clear","Clouds","Haze","Dust"]).isRequired
};

const styles = StyleSheet.create({
    container : {
        flex : 1,
        justifyContent : "center",
        alignItems : "center"
    }
})
아이콘 예시코드를 참고하면<Ionicons name="md-checkmark-circle" size={32} color="green" /> 이런식으로 하면 된다고 한다.
해당 코드는 아이콘을 클릭해도 볼 수 있다.

이대로 적용해보자.
Weather.js
import React from "react";
import { View, Text, StyleSheet } from "react-native";
import PropTypes from "prop-types";
import { MaterialCommunityIcons } from '@expo/vector-icons';

export default function Weather({temp}){
    return (
        <View style={styles.container}>
            <MaterialCommunityIcons name="weather-lightning-rainy" size={24} color="black" />
            <Text>{temp}</Text>
        </View>
    );
}

Weather.propTyeps={
    temp : PropTypes.number.isRequired,
    condition : PropTypes.oneOf(["Thunderstorm","Drizzle","Rain","Snow","Atmosphere","Clear","Clouds","Haze","Dust"]).isRequired
};

const styles = StyleSheet.create({
    container : {
        flex : 1,
        justifyContent : "center",
        alignItems : "center"
    }
})
사이즈 및 디자인 설정
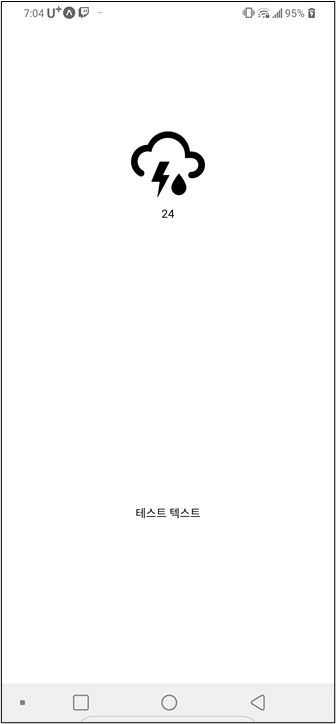
size속성을 줘서 크기를 제어해보자.<MaterialCommunityIcons name="weather-lightning-rainy" size={100} color="black" />
현재 화면을 2개로 나누자
상단부 하단부를 나누기위해 container를 하나 더 만들 계획이다.
그래서 상단부는 아이콘과 숫자
하단부는 멘트가 나오도록 하려한다.
import React from "react";
import { View, Text, StyleSheet } from "react-native";
import PropTypes from "prop-types";
import { MaterialCommunityIcons } from '@expo/vector-icons';

export default function Weather({temp}){
    return (
        <View style={styles.container}>
            <View style={styles.halfContainer}>
                <MaterialCommunityIcons name="weather-lightning-rainy" size={100} color="black" />
                <Text>{temp}</Text>
            </View>
            <View style={styles.halfContainer}>
                <Text>테스트 텍스트</Text>
            </View>
        </View>
    );
}

Weather.propTyeps={
    temp : PropTypes.number.isRequired,
    condition : PropTypes.oneOf(["Thunderstorm","Drizzle","Rain","Snow","Atmosphere","Clear","Clouds","Haze","Dust"]).isRequired
};

const styles = StyleSheet.create({
    container : {
        flex : 1,
        justifyContent : "center",
        alignItems : "center"
    },
    halfContainer : {
        flex : 1,
        justifyContent : "center",
        alignItems : "center"
    },
})
스타일 적용
온도가 나오는 텍스트 스타일은 temp로 정의하여 추가하고, 온도 옆의 단위 문자도 추가했다.

import React from "react";
import { View, Text, StyleSheet } from "react-native";
import PropTypes from "prop-types";
import { MaterialCommunityIcons } from '@expo/vector-icons';

export default function Weather({temp}){
    return (
        <View style={styles.container}>
            <View style={styles.halfContainer}>
                <MaterialCommunityIcons name="weather-lightning-rainy" size={100} color="black" />
                <Text style={styles.temp}>{temp}º</Text>
            </View>
            <View style={styles.halfContainer}>
                <Text>테스트 텍스트</Text>
            </View>
        </View>
    );
}

Weather.propTyeps={
    temp : PropTypes.number.isRequired,
    condition : PropTypes.oneOf(["Thunderstorm","Drizzle","Rain","Snow","Atmosphere","Clear","Clouds","Haze","Dust"]).isRequired
};

const styles = StyleSheet.create({
    container : {
        flex : 1,
        justifyContent : "center",
        alignItems : "center"
    },
    halfContainer : {
        flex : 1,
        justifyContent : "center",
        alignItems : "center"
    },
    temp:{
        fontSize : 40
    },
})'2018~ > react native' 카테고리의 다른 글
| 1회차 - 08 ES6 문법 - Arrow function (0) | 2020.07.01 |
|---|---|
| 1회차 - 07 ES6 문법 - rest operator (0) | 2020.06.30 |
| 1회차 - 06 componentDidUpdate , ReactNative의 LifeCycle API (0) | 2020.06.30 |
| 1회차 - 05 ES6 문법 - Async, Await (0) | 2020.06.30 |
| [자료 찾기] react native expo로 firebase 사용하기 (0) | 2020.06.30 |
| 1회차 - 04 react native 날씨 앱 따라 만들기(3), 지역 가져오기 (1) | 2020.06.29 |
| 1회차 - 03 react native 날씨 앱 따라 만들기(2), 리액트 네이티브 Nox, BlueStack으로 연동 개발하기 (0) | 2020.06.29 |
| 1회차 - 02 react native 날씨 앱 따라 만들기(1) (0) | 2020.06.29 |
